サムネイル画像の作成方法 - サンプルコード
当ページのリンクには広告が含まれています。
プログラミング言語PHPで、サムネイル画像を作成する方法(サンプルコード)を紹介します。
サンプルコード
サムネイル画像を作成するサンプルコードです。
<?php
// コンテンツがPNG画像であることをブラウザにお知らせ
header ('Content-Type: image/png');

// オリジナル画像のファイルパスを指定
$original_file = 'images/sakura.png';

// getimagesize関数 オリジナル画像の横幅・高さを取得
list($original_width, $original_height) = getimagesize($original_file);

// サムネイルの横幅を指定
$thumb_width = 200;

// サムネイルの高さを算出 round関数で四捨五入
$thumb_height = round( $original_height * $thumb_width / $original_width );

// オリジナルファイルの画像リソース
$original_image = imagecreatefrompng($original_file);

// サムネイルの画像リソース
$thumb_image = imagecreatetruecolor($thumb_width, $thumb_height);

// サムネイル画像の作成
imagecopyresized($thumb_image, $original_image, 0, 0, 0, 0,
                 $thumb_width, $thumb_height,
                 $original_width, $original_height);

// サムネイル画像の出力
imagepng($thumb_image);

// 画像リソースを破棄
imagedestroy($original_image);
imagedestroy($thumb_image);
?>
少し長いのでひとつずつ細かく分解して、みていきましょう。
ヘッダー
作成したサムネイル画像をPNG画像として出力するため、まずはブラウザーにコンテンツがPNG画像ですよーっとお知らせしておきましょう。
// コンテンツがPNG画像であることをブラウザにお知らせ
header ('Content-Type: image/png');
JPEG画像の場合はこのように記述します。
// コンテンツがJPEG画像であることをブラウザにお知らせ
header ('Content-Type: image/jpeg');
オリジナル画像のサイズ
次にサムネイルを作成するオリジナル画像の横幅と高さを取得します。
// オリジナル画像のファイルパスを指定
$original_file = 'images/sakura.png';

// オリジナル画像の横幅・高さを取得
list($original_width, $original_height) = getimagesize($original_file);
サムネイル画像のサイズ
取得したオリジナル画像のサイズからサムネイル画像のサイズを計算します。ここではサムネイル画像の横幅を「200」に固定し、高さを算出しています。
// サムネイルの横幅を指定
$thumb_width = 200;

// サムネイルの高さを算出 round関数で四捨五入
$thumb_height = round( $original_height * $thumb_width / $original_width );
画像リソースの確保
オリジナル画像とサムネイル画像をメモリ上の画像リソースとして確保します。
// オリジナルファイルの画像リソース
$original_image = imagecreatefrompng($original_file);

// サムネイルの画像リソース
$thumb_image = imagecreatetruecolor($thumb_width, $thumb_height);
サムネイル画像の作成
画像リソースと横幅・高さを指定し、サムネイル画像を作成します。
// サムネイル画像の作成
imagecopyresized($thumb_image, $original_image, 0, 0, 0, 0,
                 $thumb_width, $thumb_height,
                 $original_width, $original_height);
サムネイル画像の出力
作成したサムネイル画像をブラウザーへ出力します。
// サムネイル画像の出力
imagepng($thumb_image);
画像リソースの破棄
確保しておいた画像リソースを破棄します。
// 画像リソースを破棄
imagedestroy($original_image);
imagedestroy($thumb_image);
オリジナル画像とサムネイル画像を表示
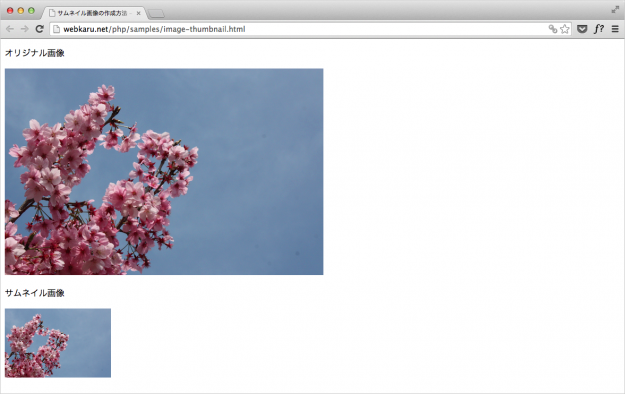
HTMLでオリジナル画像とサムネイル画像を表示してみましょう。
サムネイル画像を作成するサンプルコードをファイル名「image-thumbnail.php」として保存し、以下の HTML から呼び出します。
<!DOCTYPE html>
<html>
<head>
<meta charset="utf-8">
<title>サムネイル画像の作成方法 - PHP入門 - Webkaru</title>
</head>
<body>
<p>オリジナル画像</p>
<img src="images/sakura.png" />

<p>サムネイル画像</p>
<img src="image-thumbnail.php" />
</body>
</html>
それでは実際に HTML へアクセスしてみましょう。
サンプルにアクセスするとこのようにオリジナル画像から指定した横幅のサムネイル画像が作成されていますね。
